Custom Fields
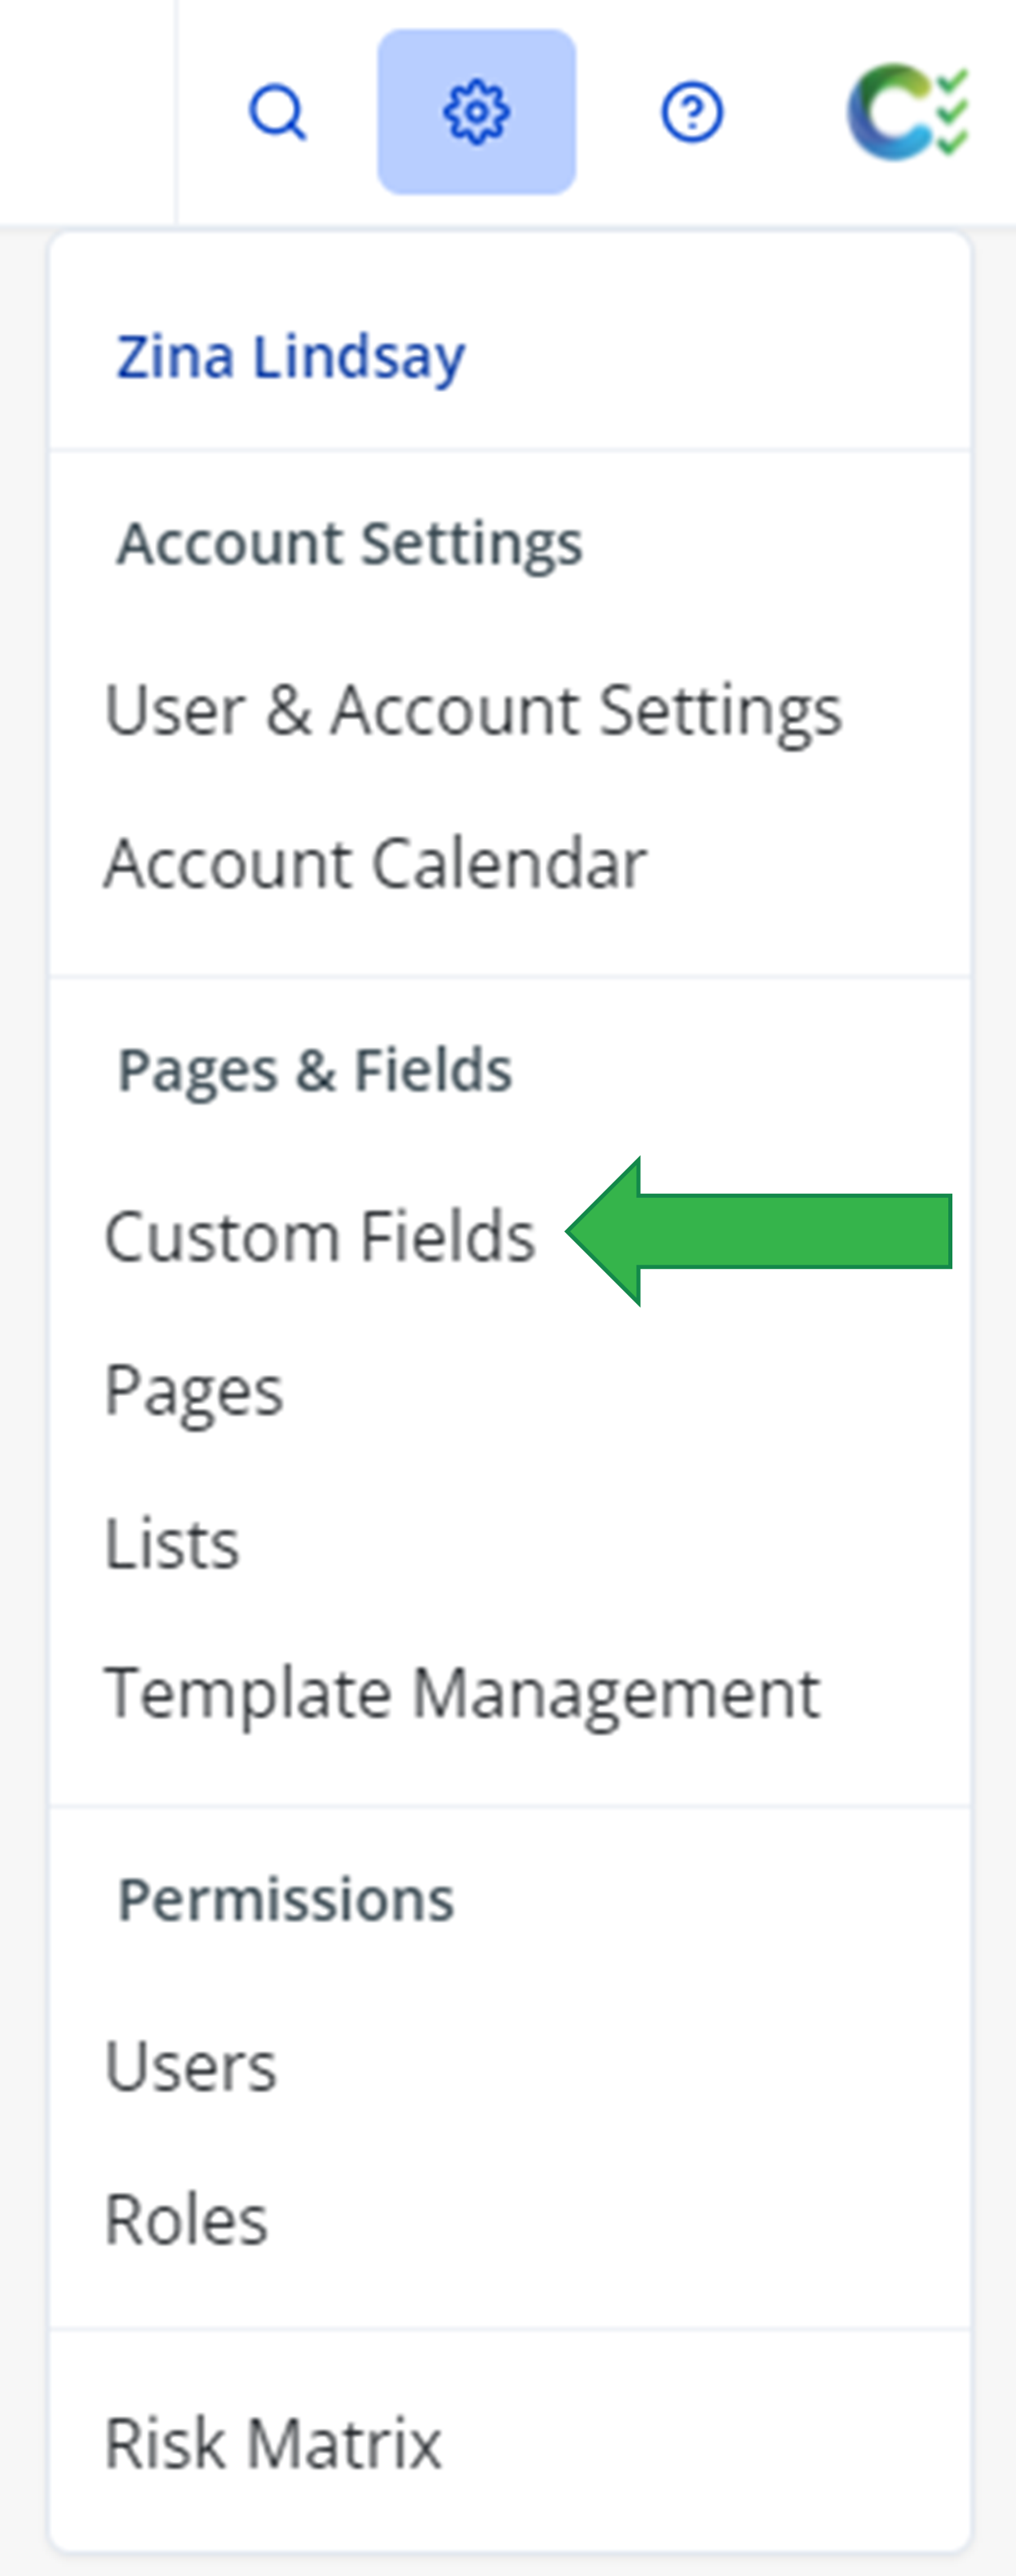
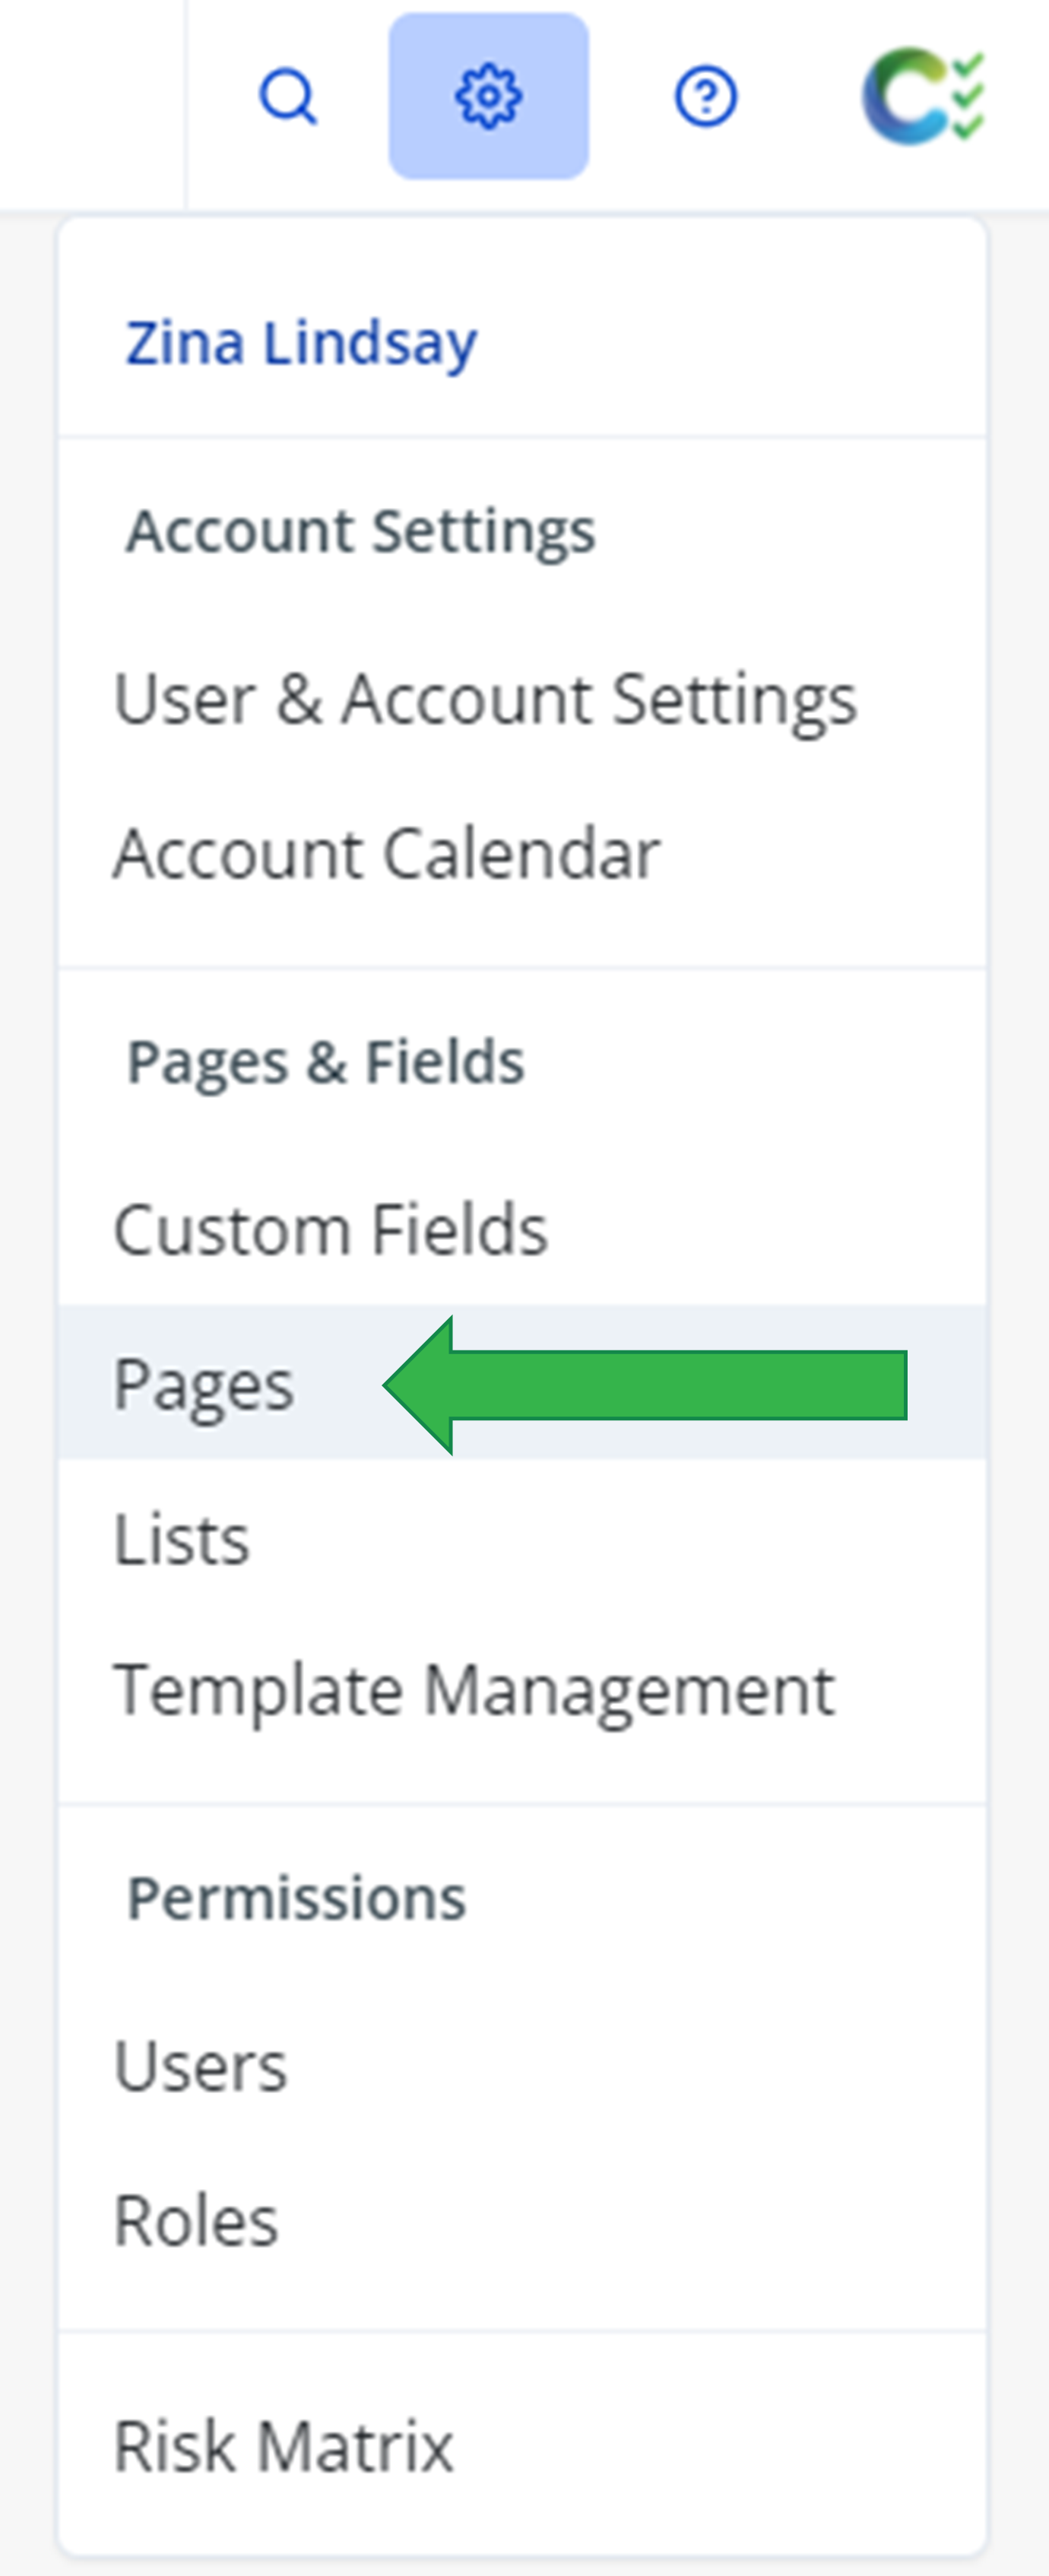
Click on the Gear icon in the top right-hand corner and click on Custom Fields under Pages & Fields
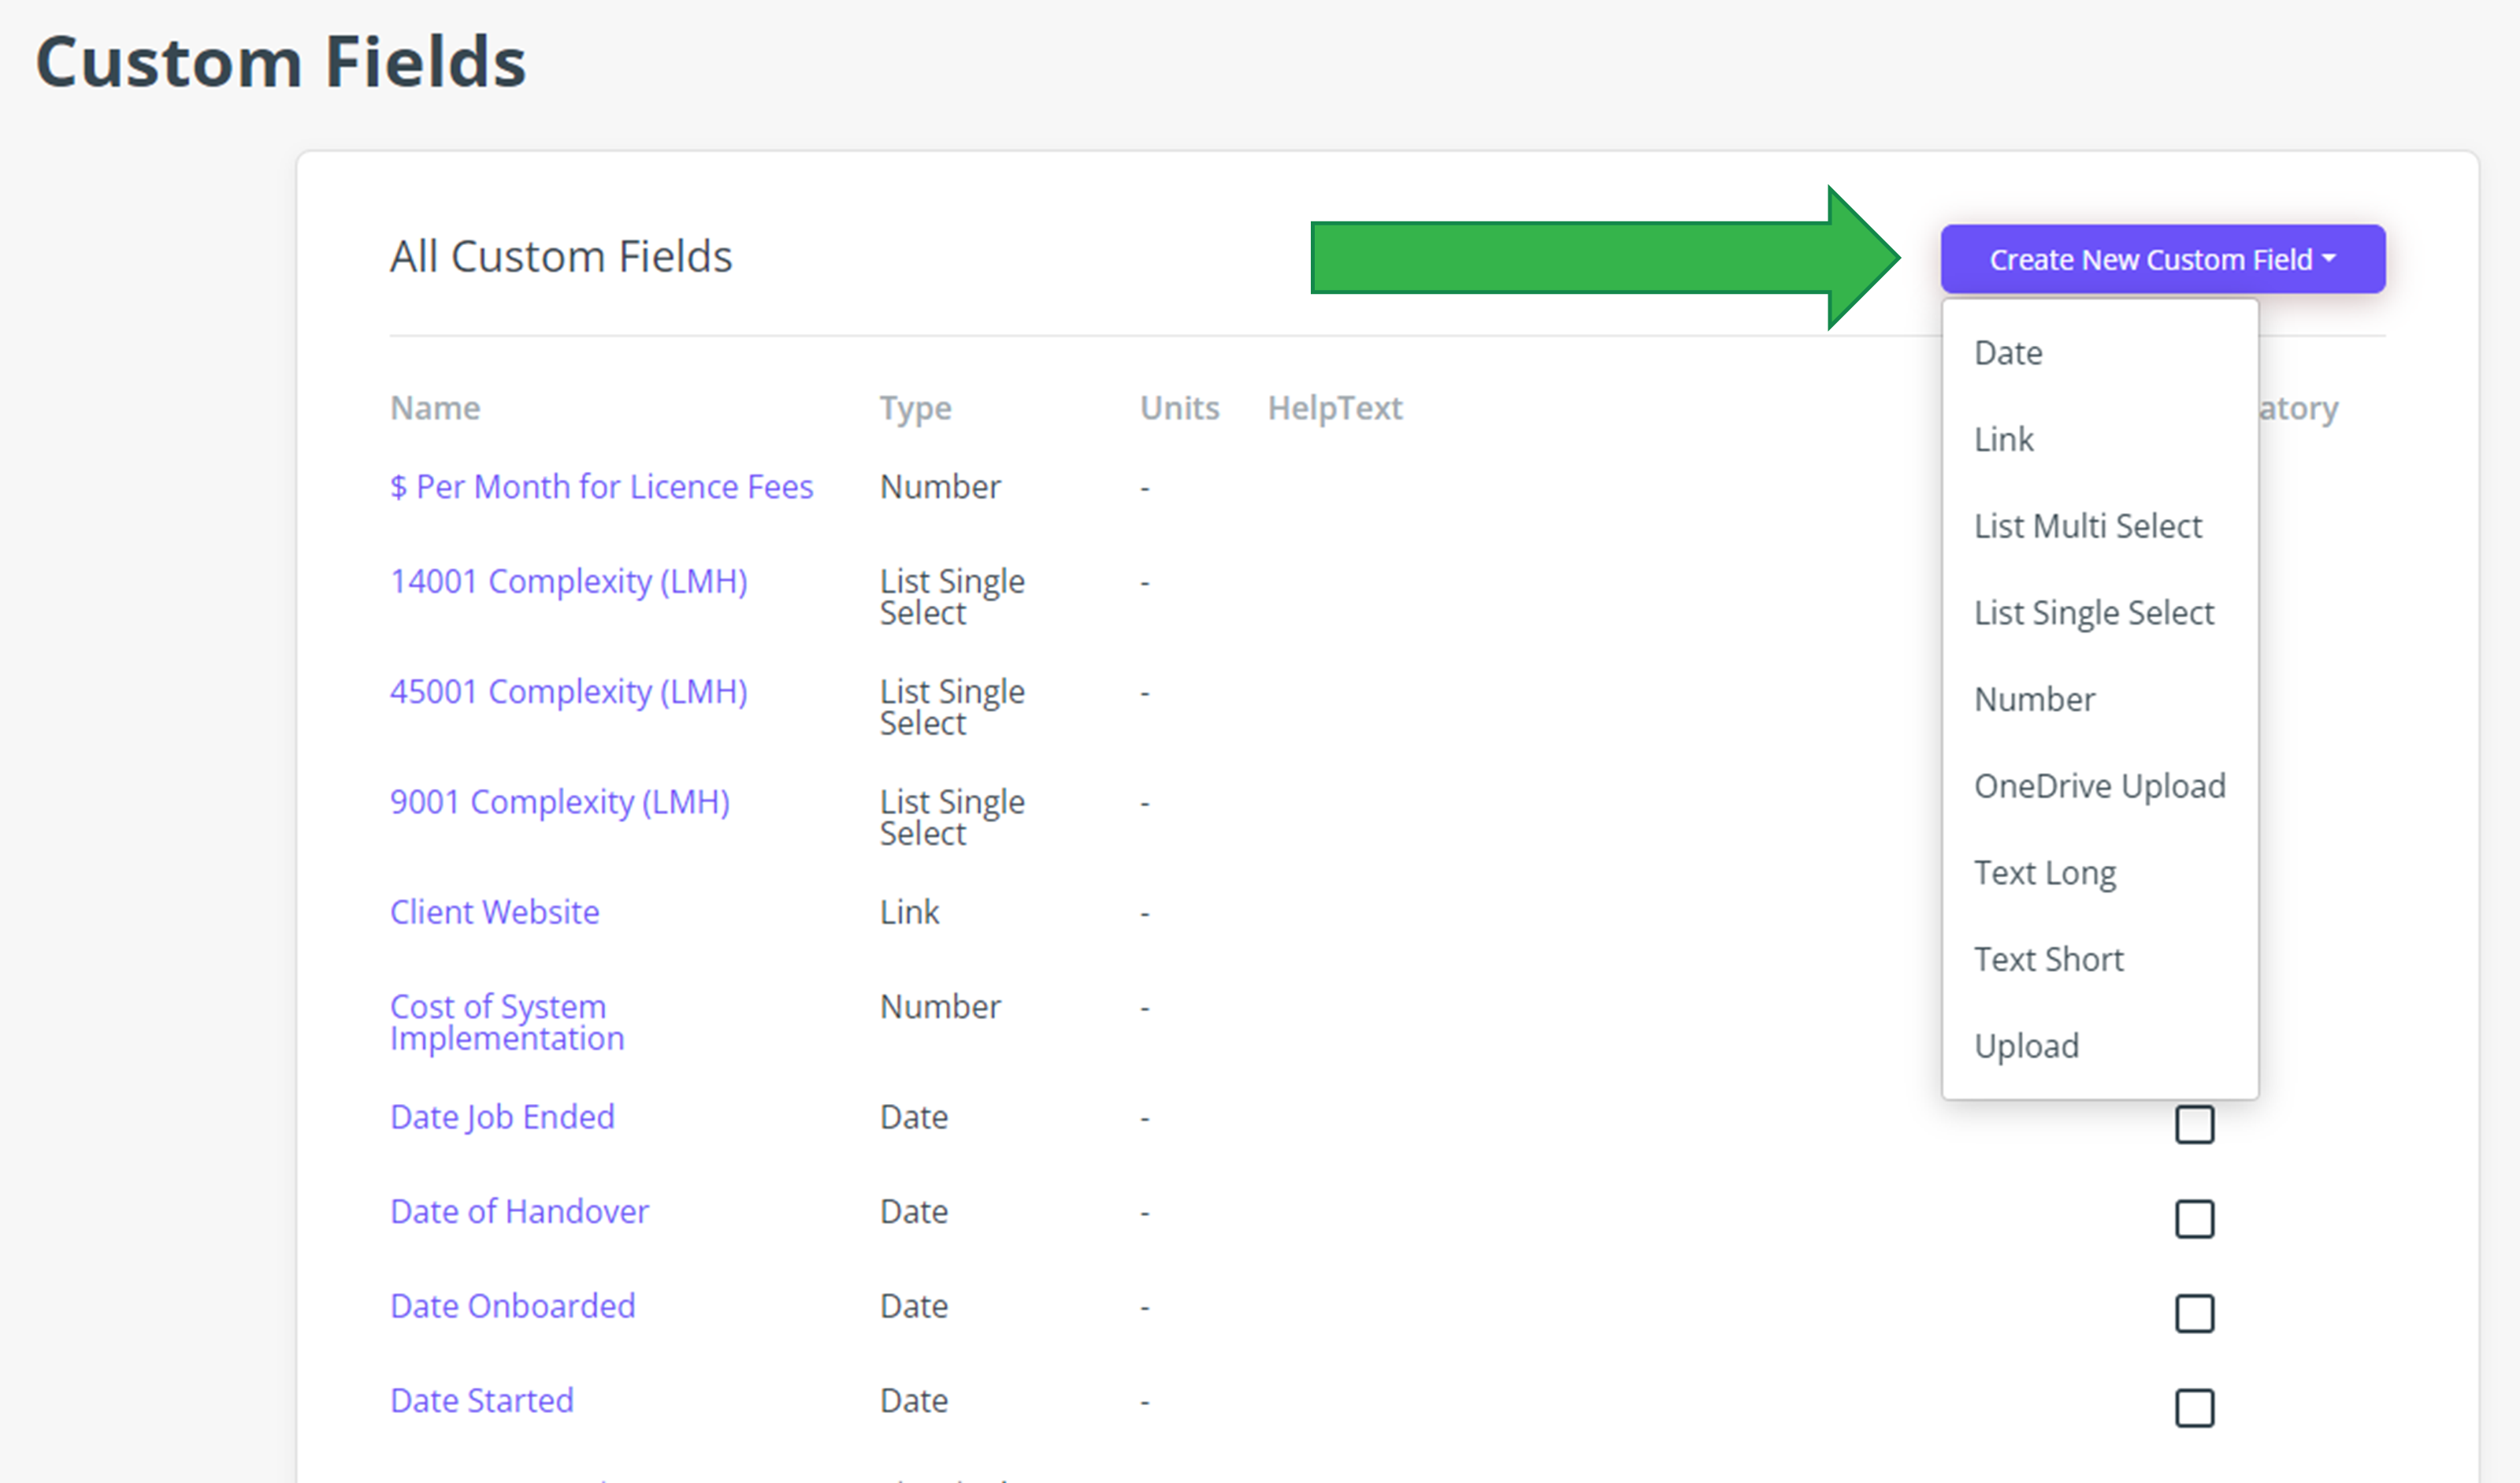
Click on Create New Custom Field and click on the type of field from the dropdown menu
List Fields
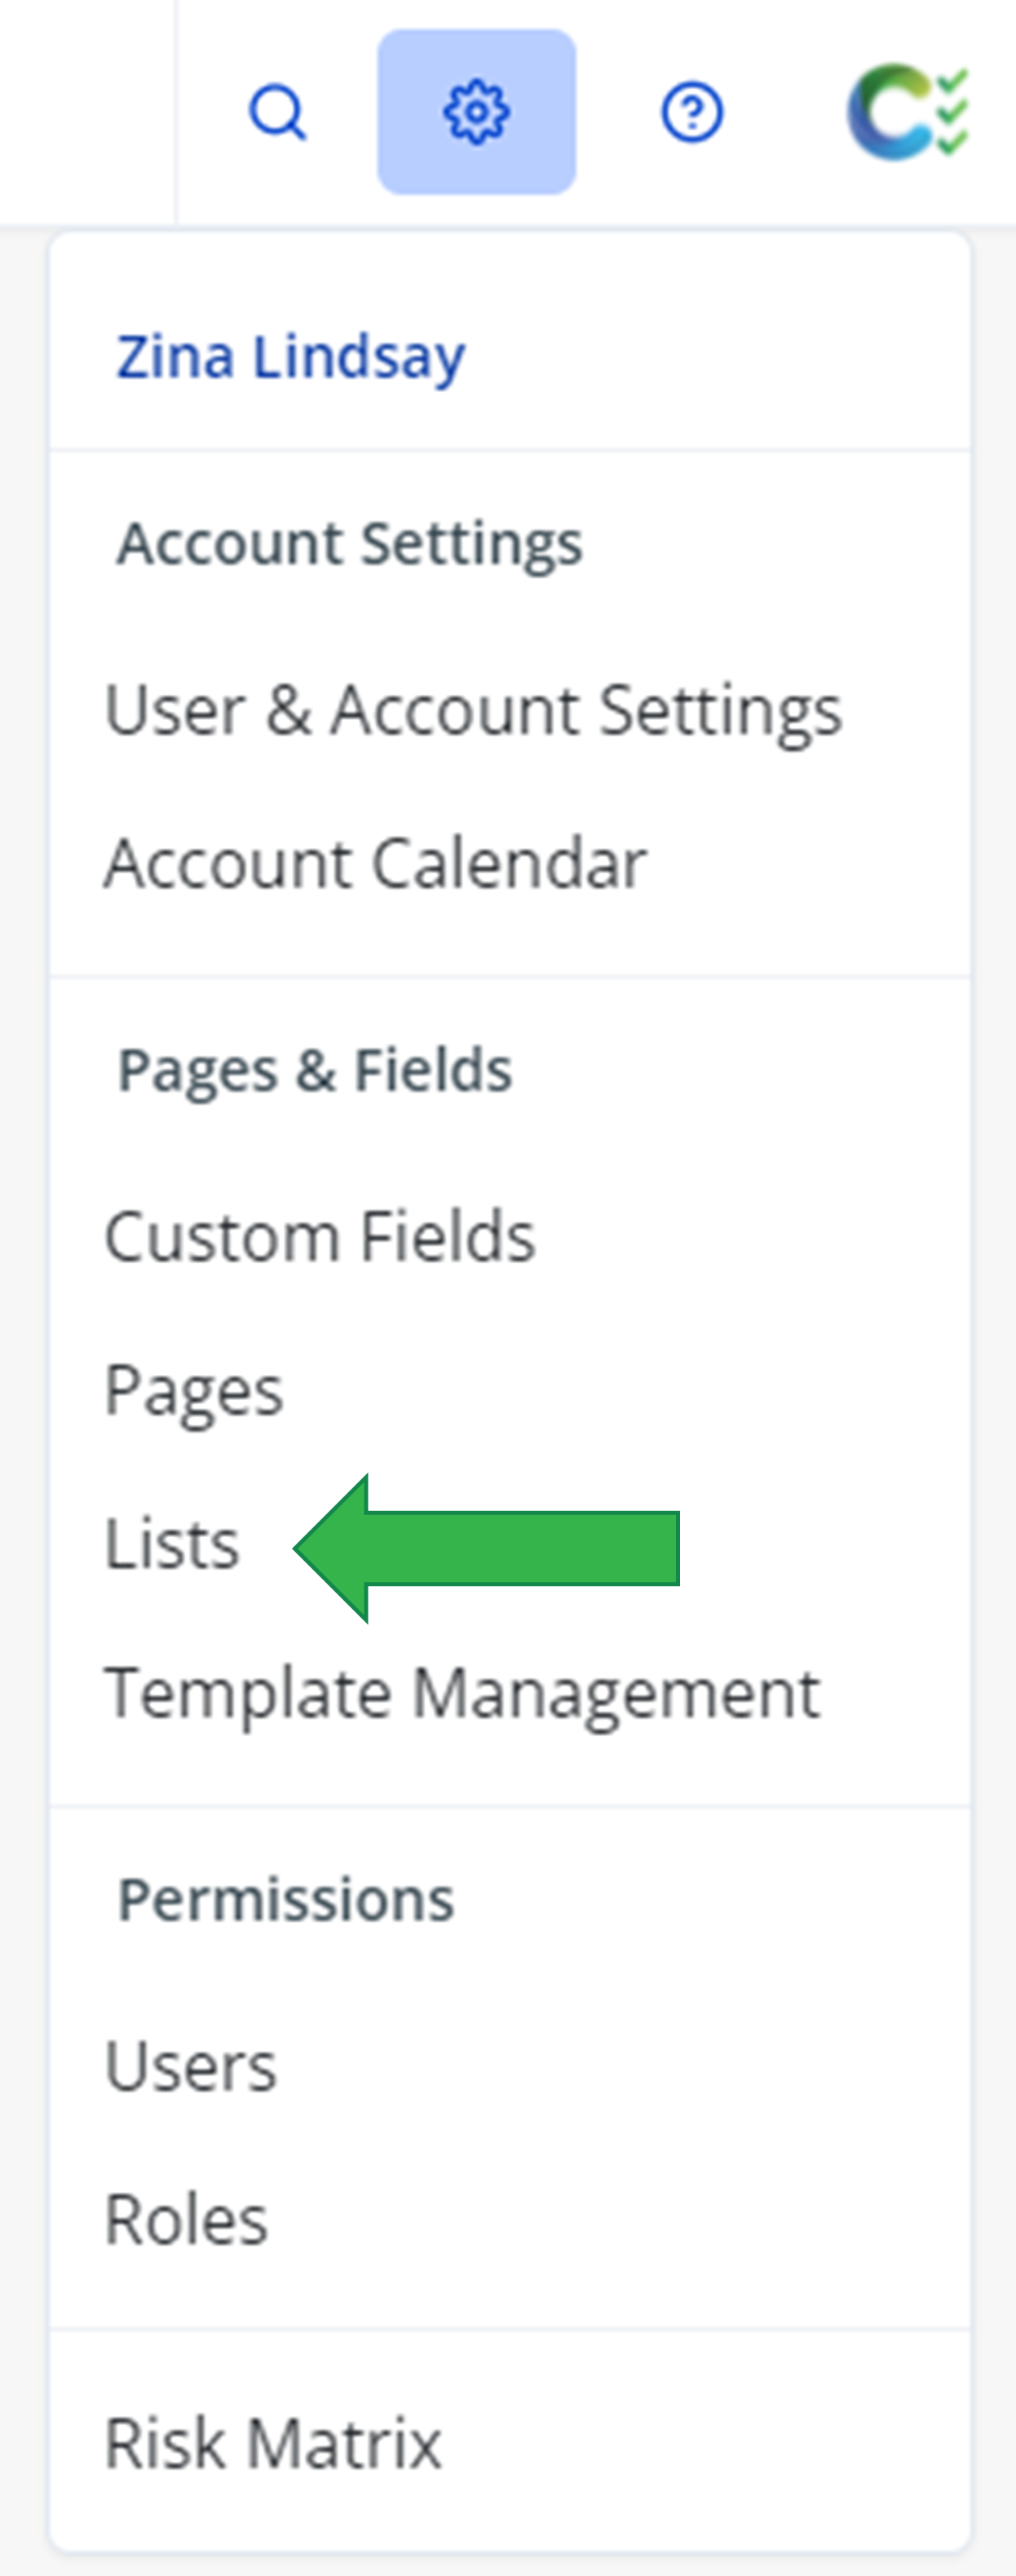
To create custom list fields, you must first create a list. To do this, click on the gear in the top right and then click on Lists under Pages & Fields
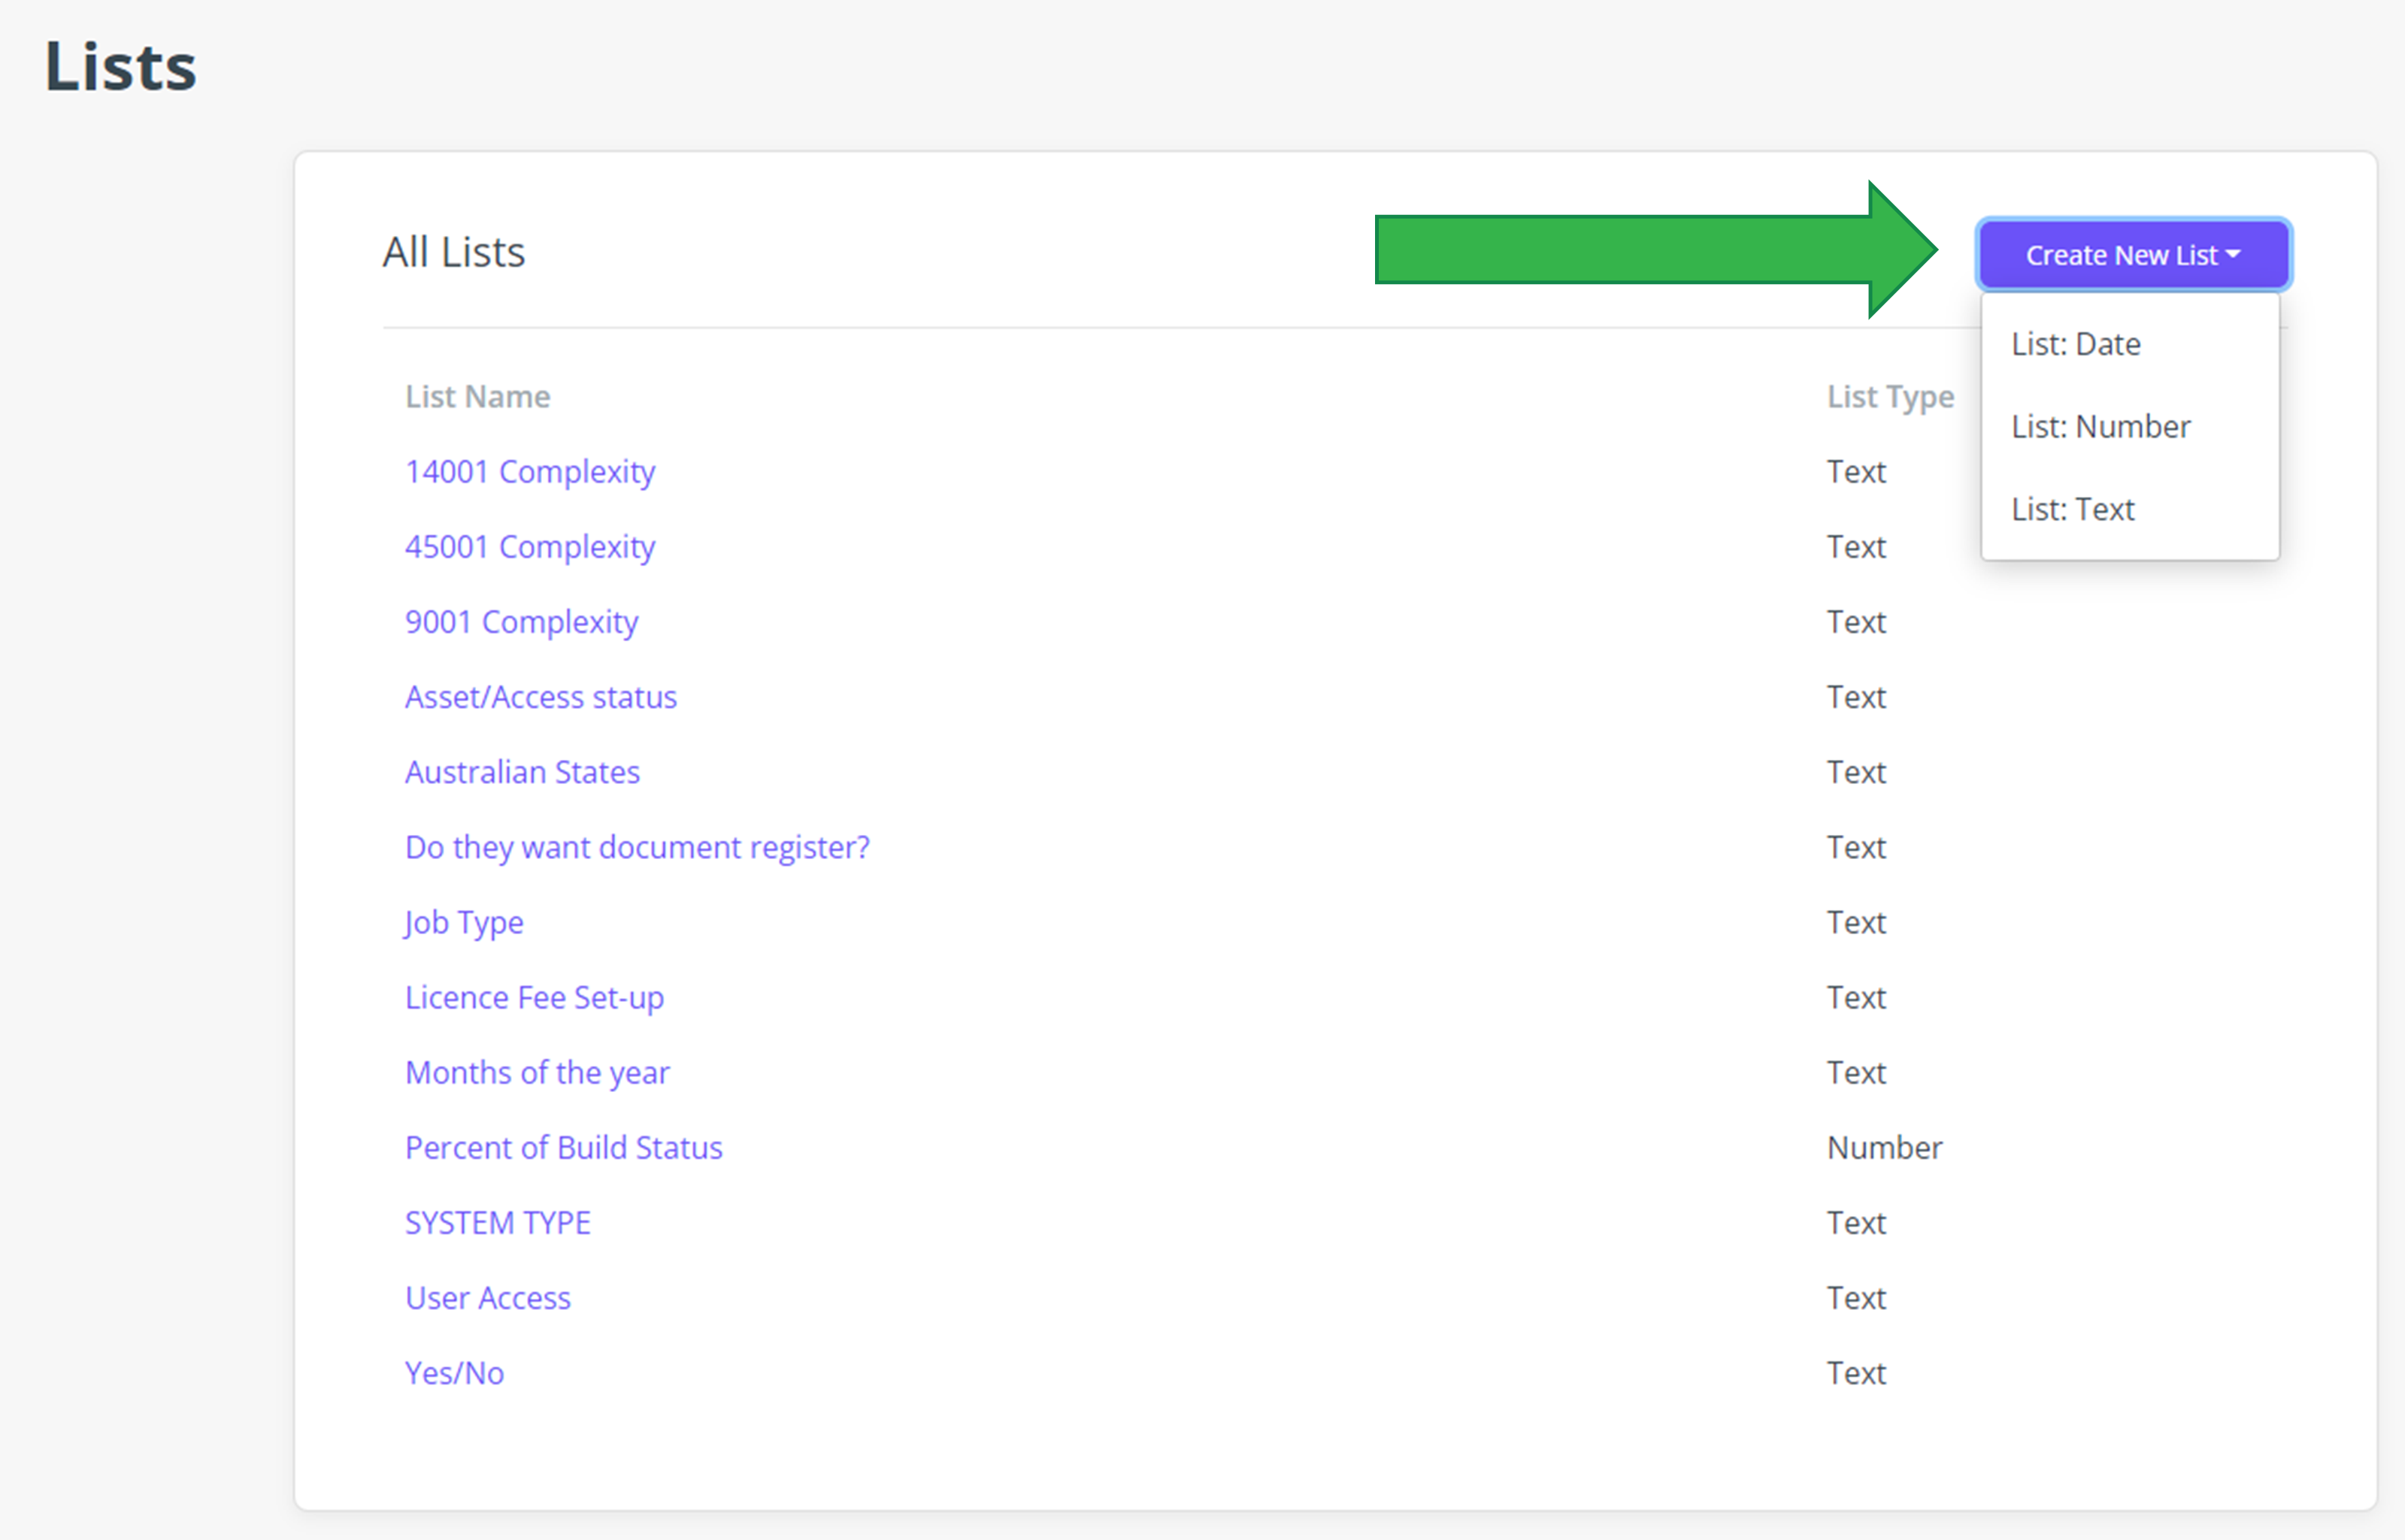
Click on Create New List in the top right corner and click on the type of list from the dropdown menu
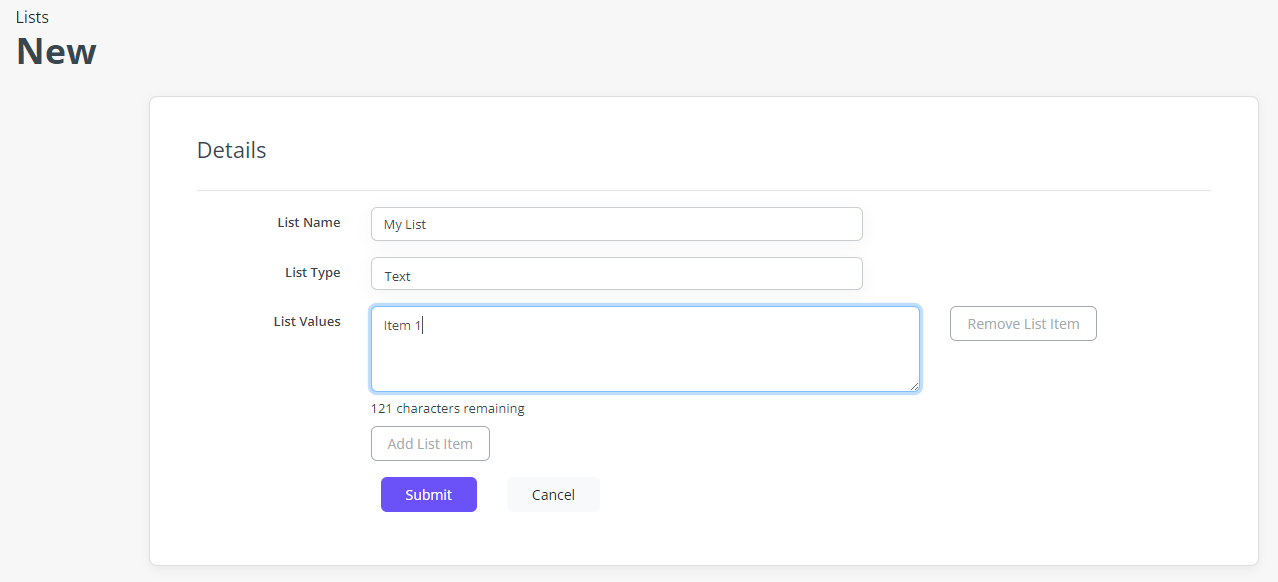
Type in a name for the list and start adding list items. To add a new list item, click the Add List Item button at the bottom of the last item in the list. To remove a list item, click the Remove List Item button on the right-hand side. When finished, click Submit to save
Once the list has been created, click on the Gear icon in the top right-hand corner and click on Custom Fields under Pages & Fields
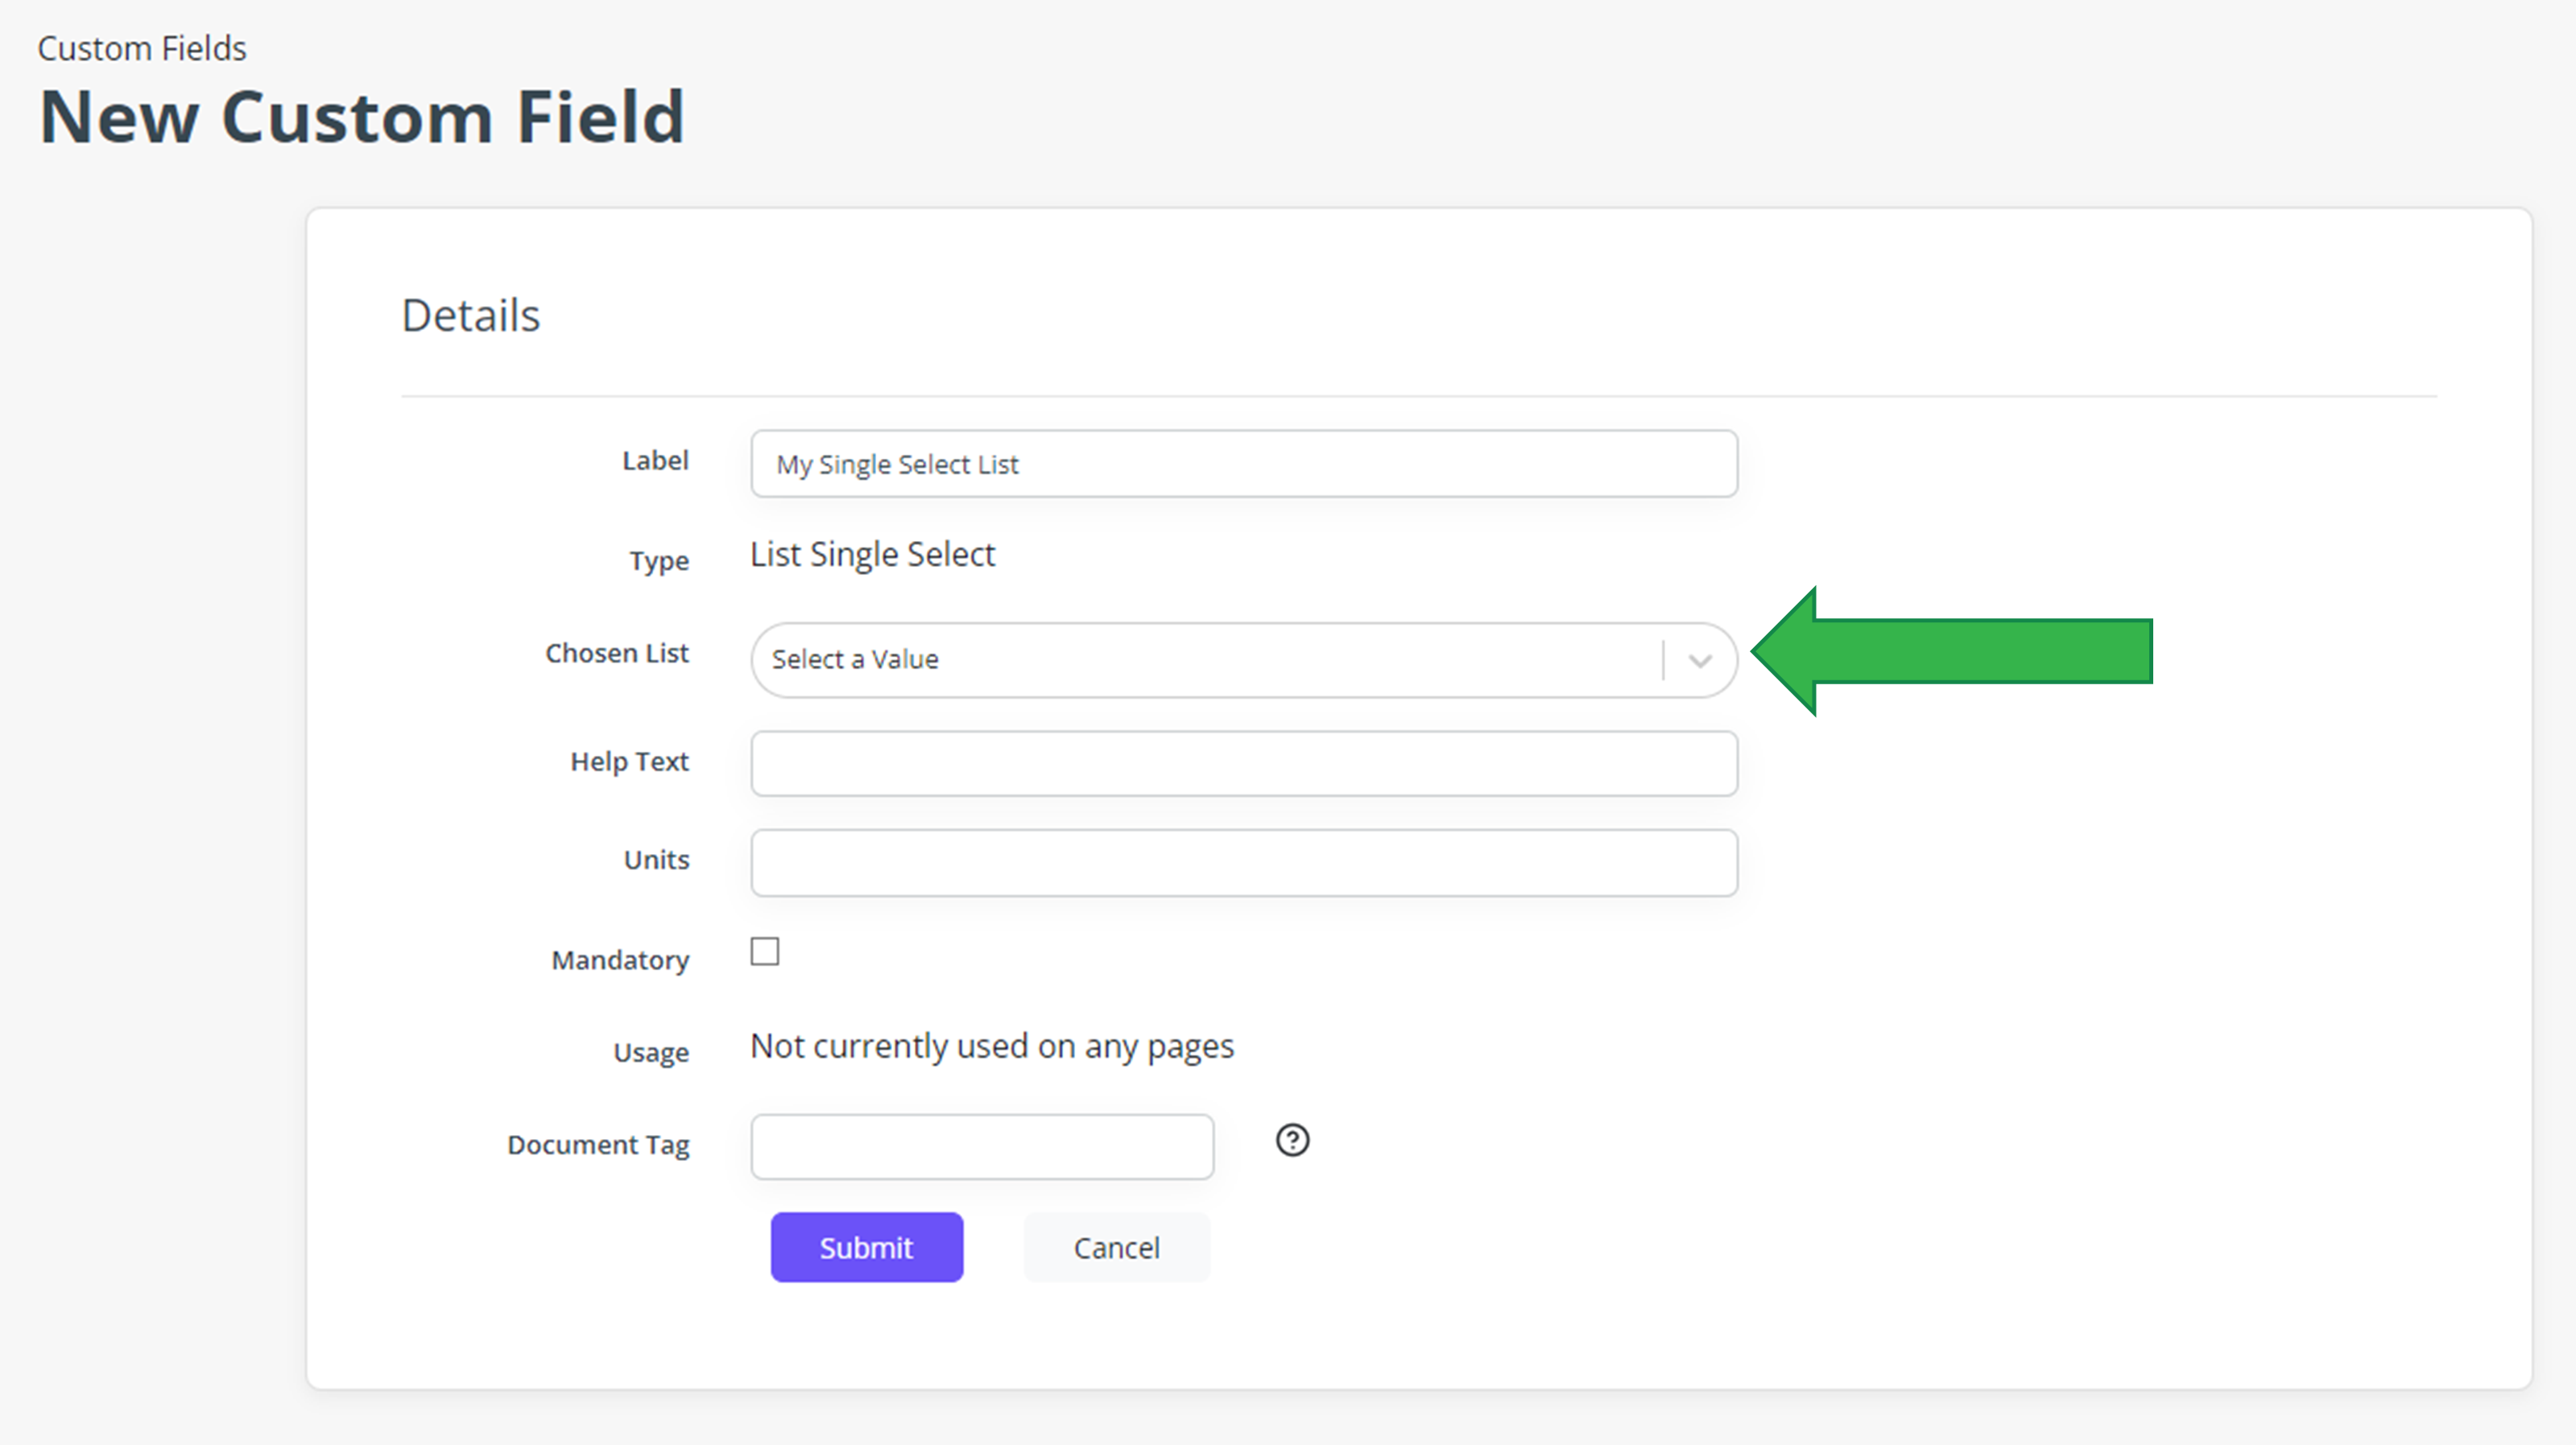
Click on Create Custom Field and click on either List Multi Select or List Single Select
Type in a name for the field and select the relevant list from the dropdown list titled Chosen List. Click Submit to save
Adding/Removing Custom Fields
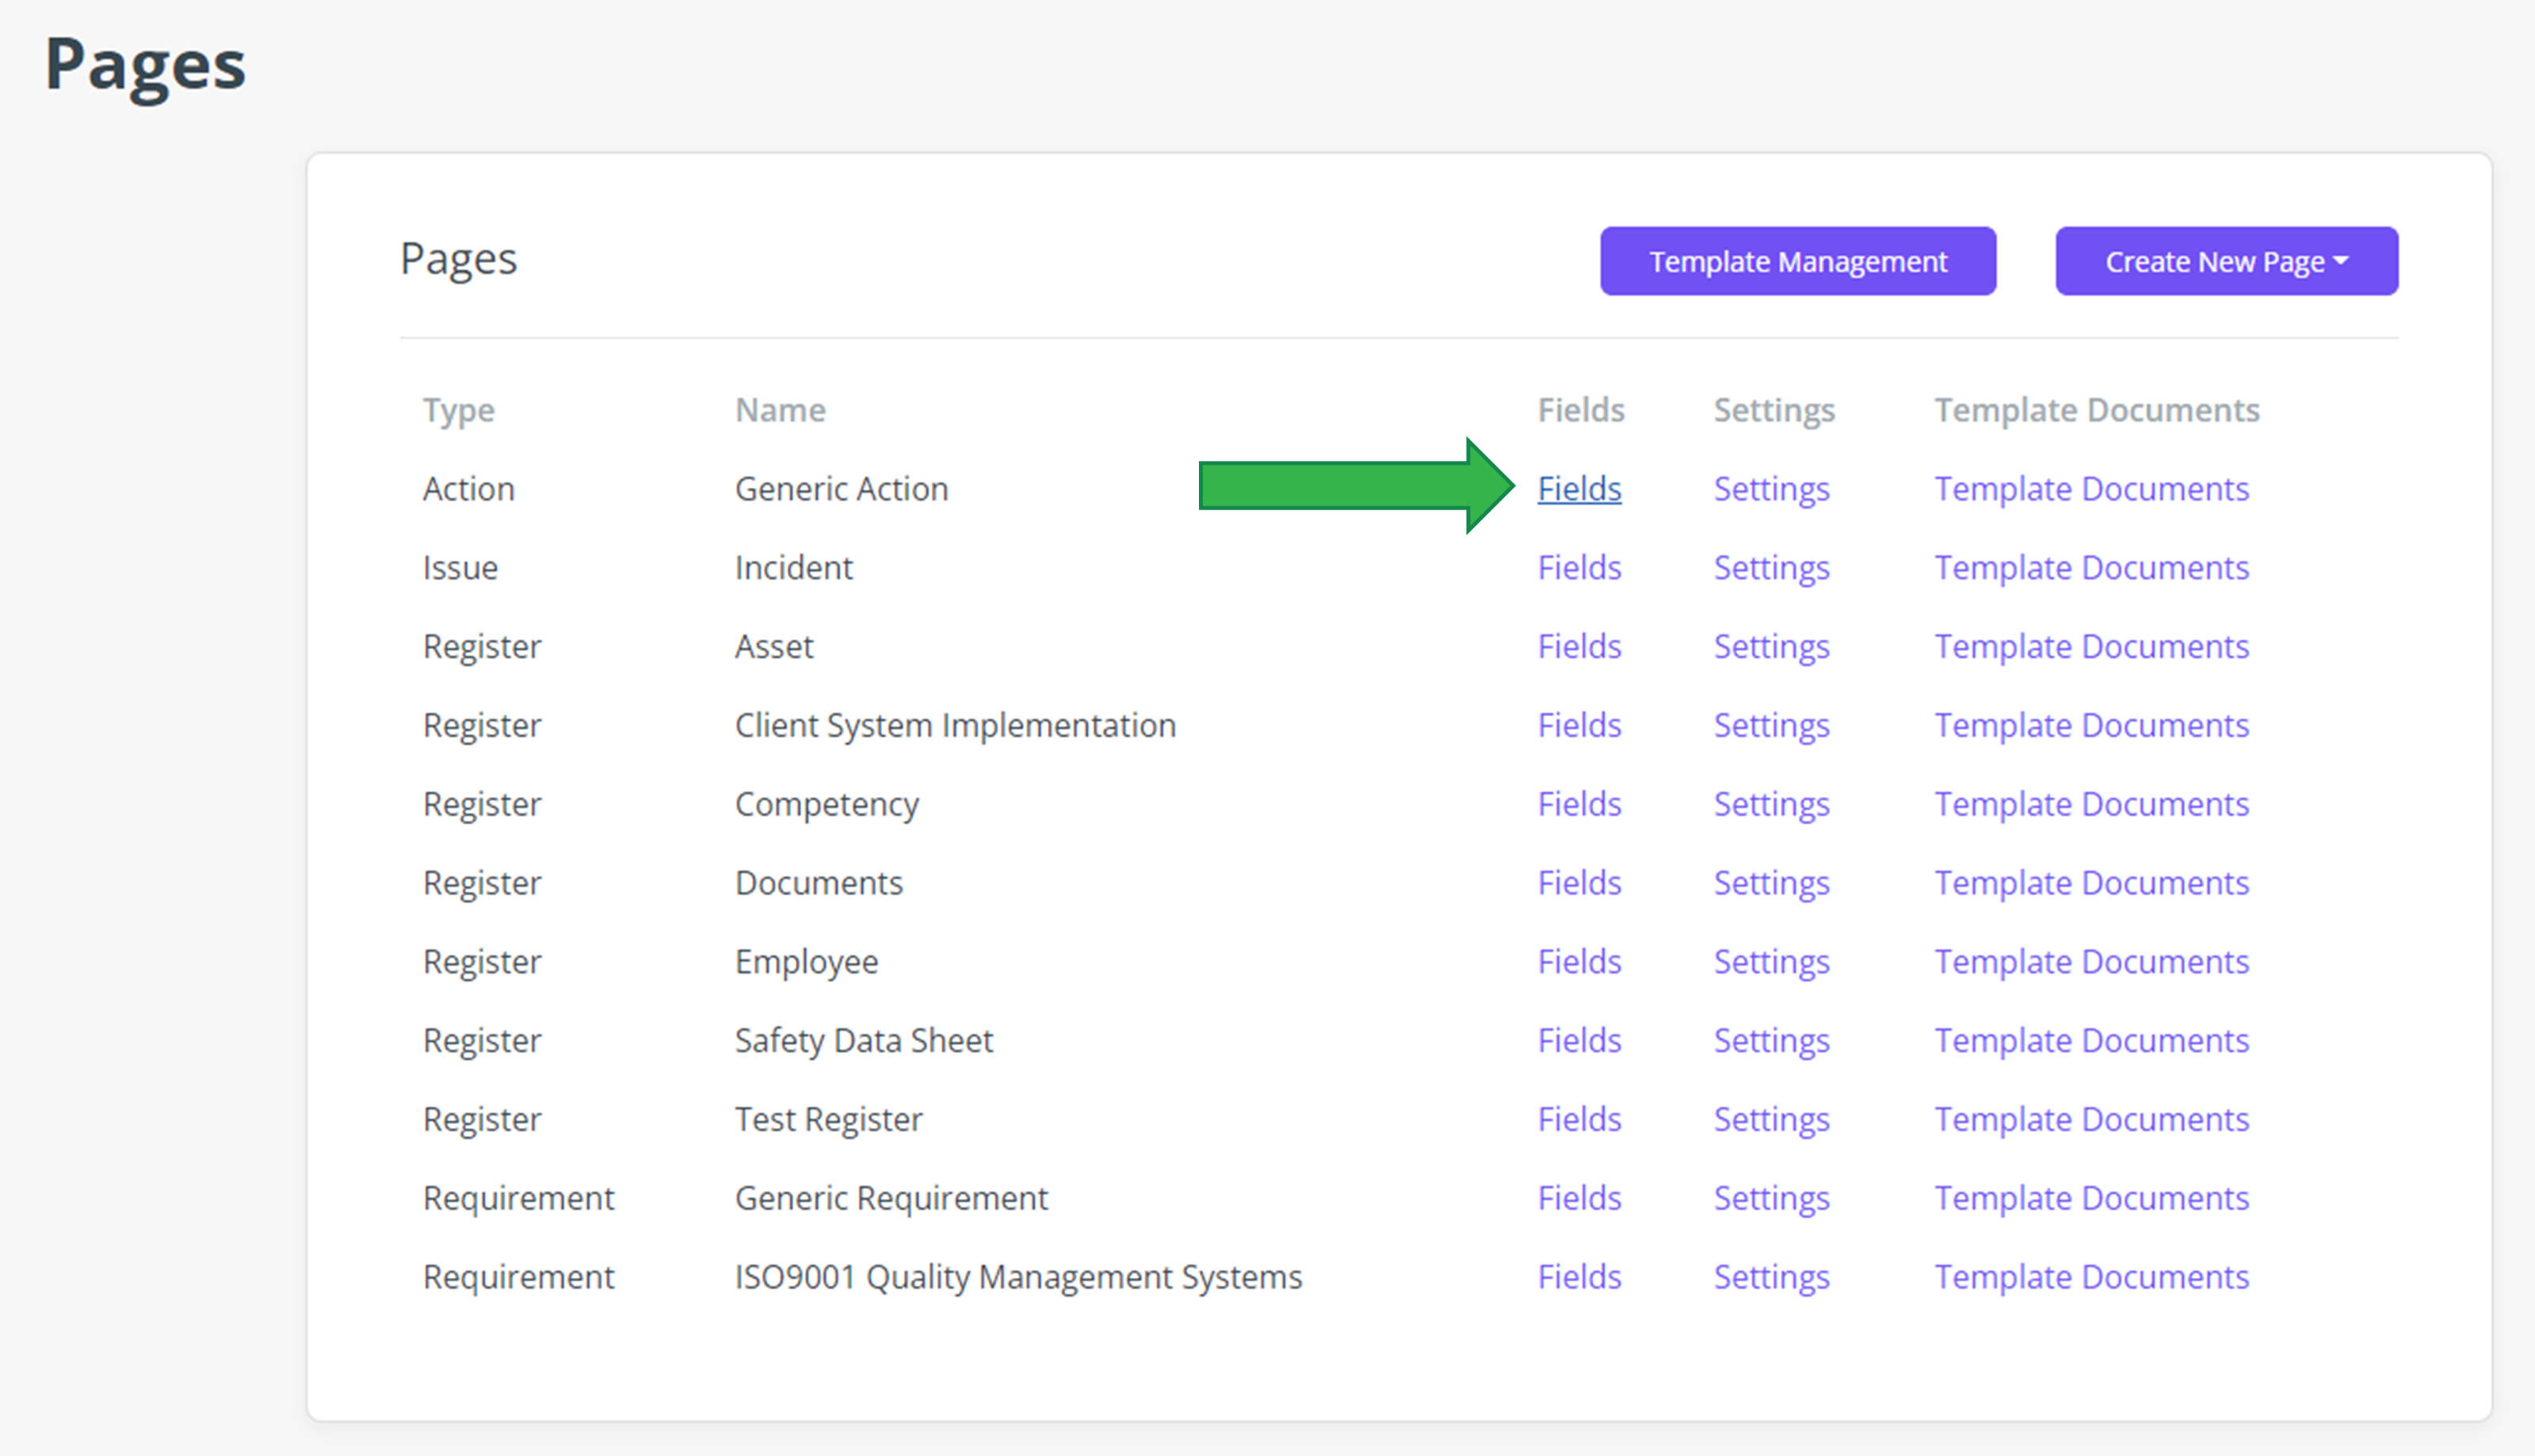
Click on the Gear icon in the top right-hand corner and click on Pages under Pages & Fields
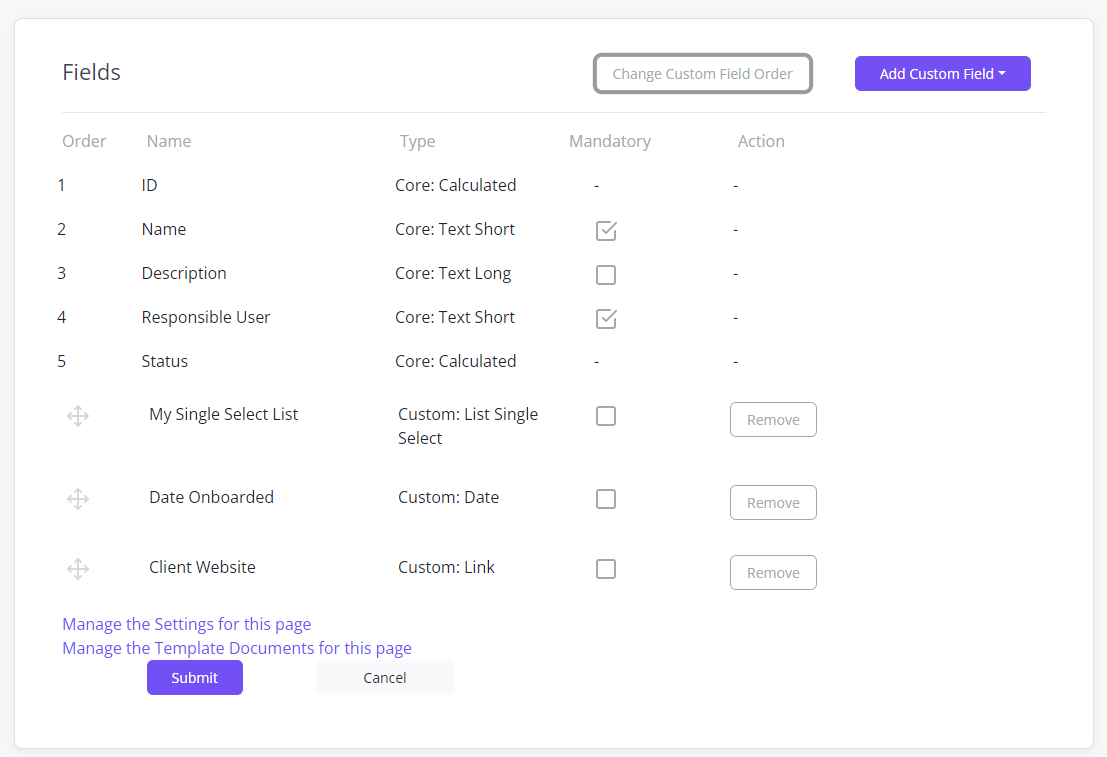
Click on Fields next to the page the field will be added to
Click on Add Custom Field in the top right and select the field from the dropdown menu
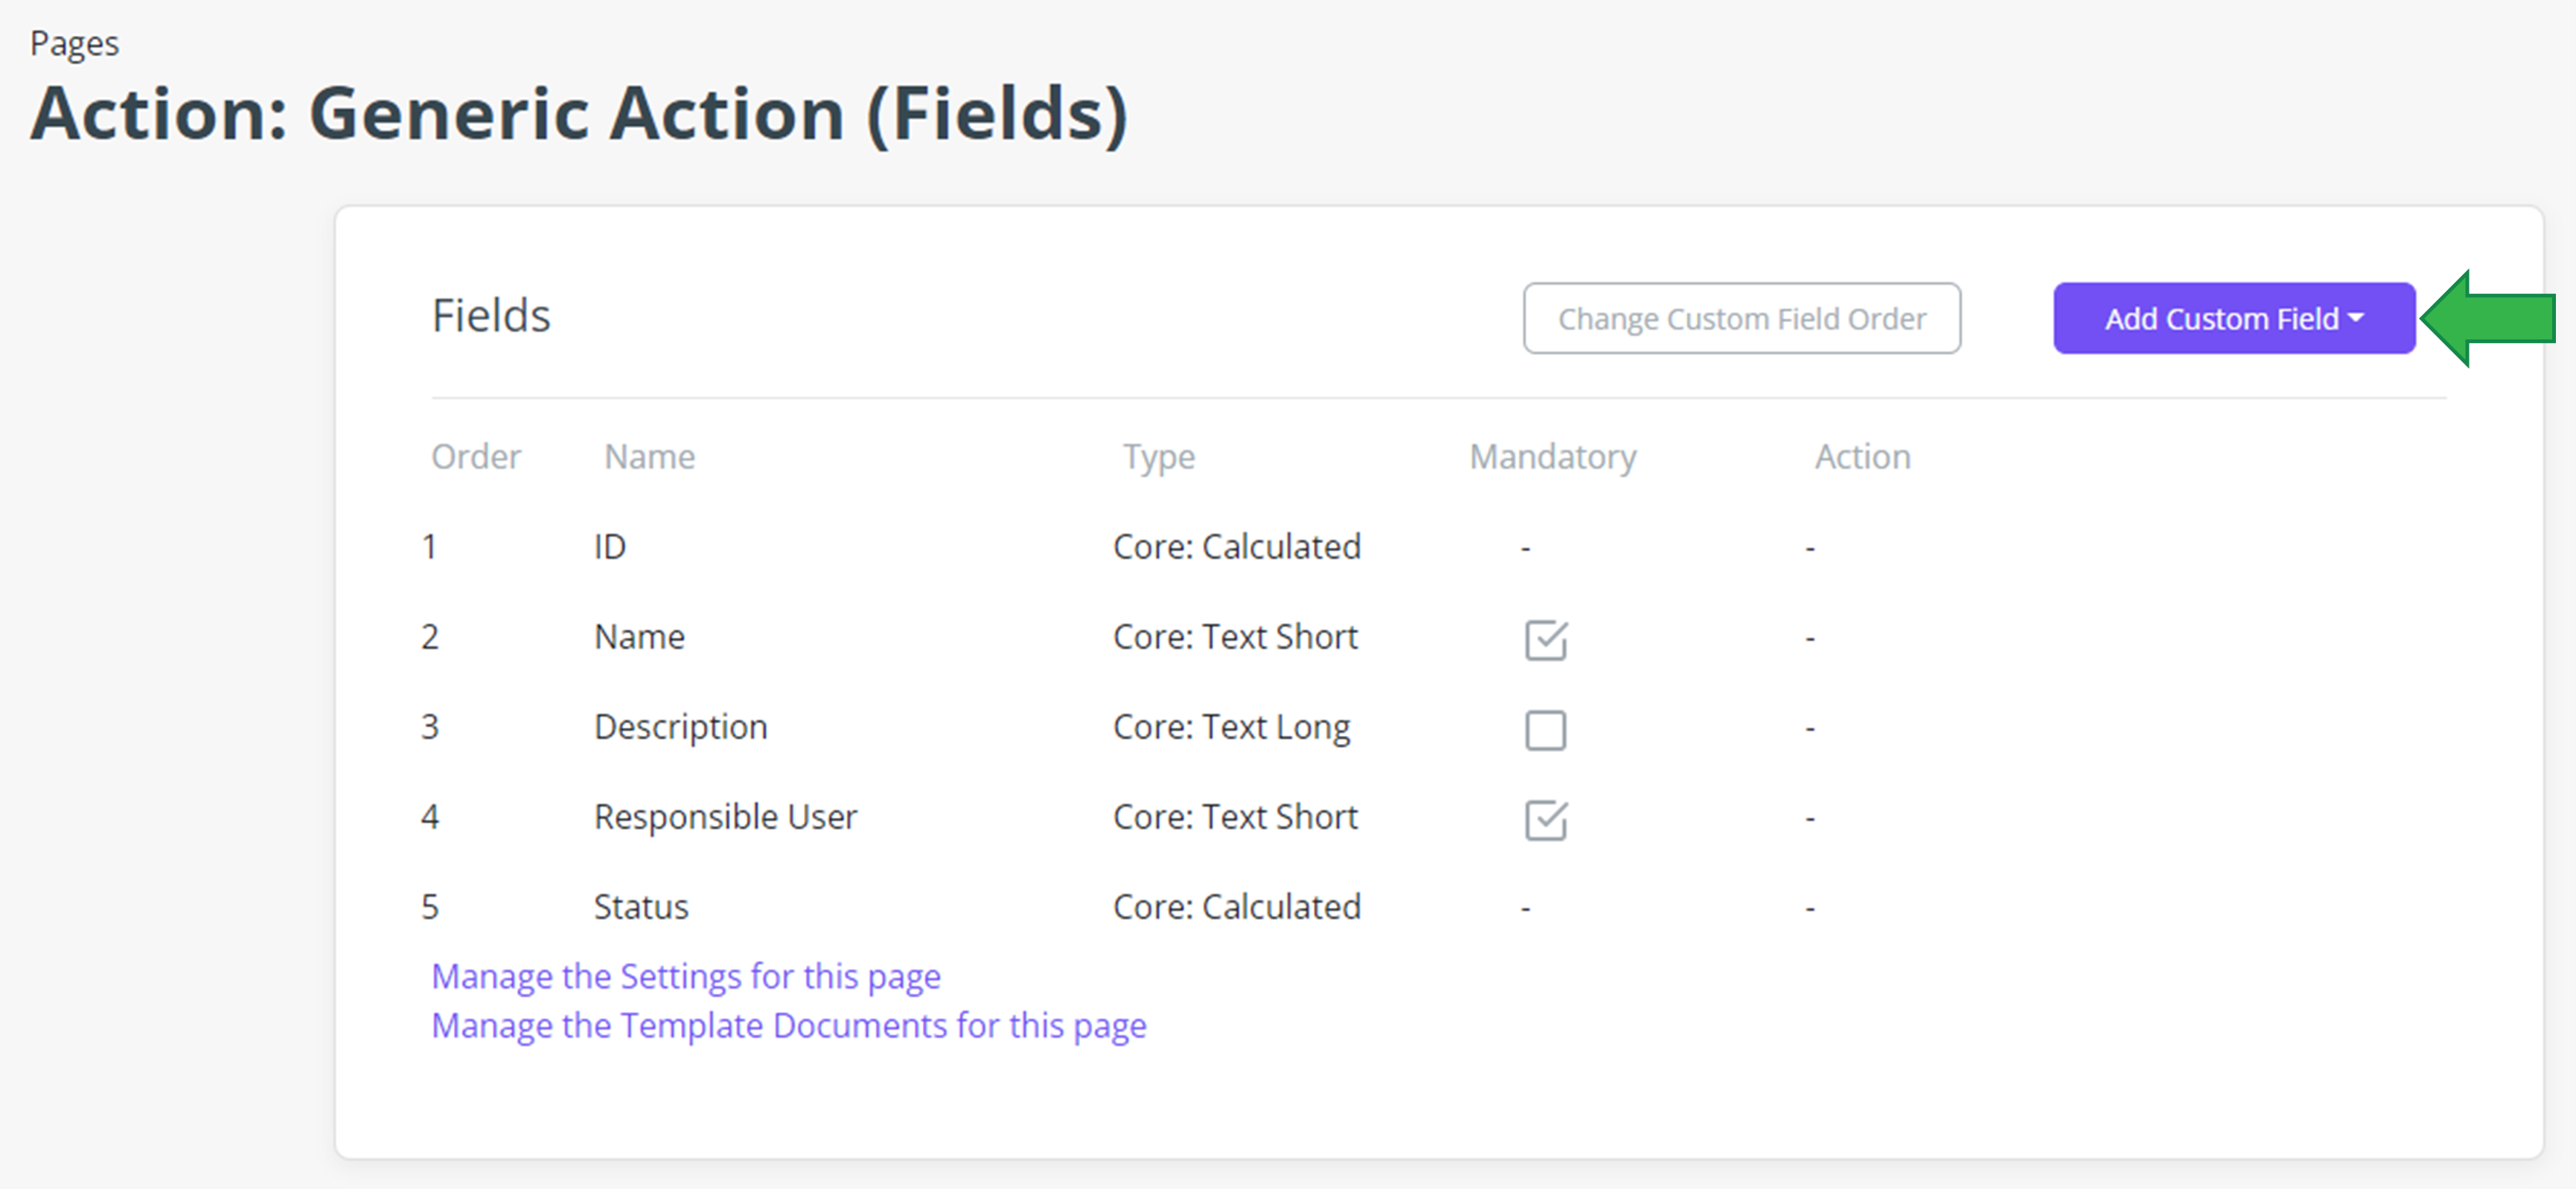
To reorder fields on the page, click Change Custom Field Order at the top next to the Add Custom Field button
To remove a custom field, click the remove button next to the field
Any changes made to the page are saved automatically
The first 5 fields: ID, Name, Description, Responsible User, and Status cannot be removed or rearranged